Showing posts with label boxes. Show all posts

Saturday, August 30, 2014

Recycled, buttoned-up box


I DO love recycling... and I DO love playing with cardboard and papers ( but this you already are aware of ;) )
As you all know, after using day by day adhesive tapes, you got a lot of empty rolls. Lots of rolls. Cardboard empty rolls ;). Wider or thinner, I just kept saving them, one by one...The stash is seriously growing . So , I had to make something, right ? :D
Here is the material gathered : empty rolls, cardboard, buttons, paper tape adhesive and glue. Some others are added on the way, like acrylic paints, cords, sea shells and other sea beauties found on the beaches....


First I transformed the rolls into a base and a lid . This two together are forming a round box. 
Chop-chop, snip-snip, glue-glue and ...voila !
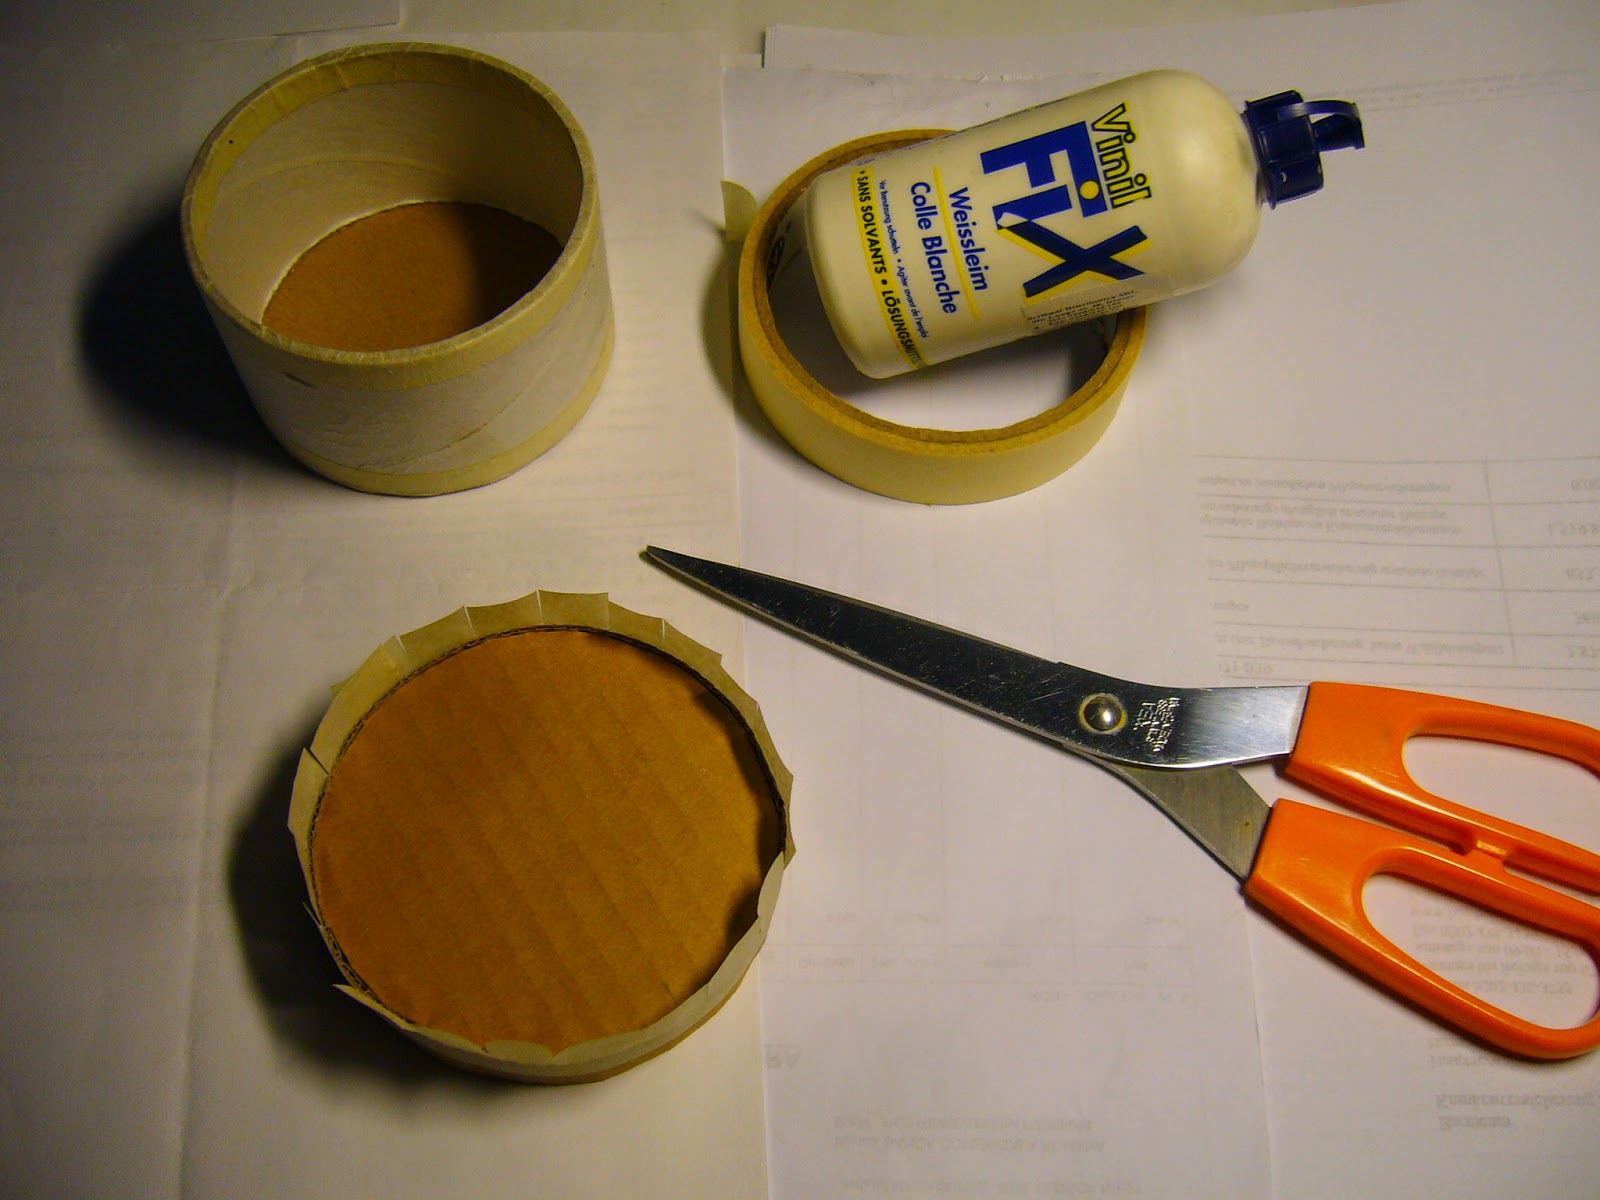

then I tried that the lid fits properly over the base..


Then comes the gesso applying step and some drying time ( which leads me to forget about taking photos :D ) . 
Now it's time for play ! with all those buttons scattered on the table , it was such a fun. Creative fun ! ;)


Thinking, auditioning, starting over again... a few times. Combining, painting, gluing again....until THIS happened  :

 - and an angled view over the top - 


I finished the inside with white felt . This gives a smooth feel to the box so it can holds some jewelries, or some sweet memories or ( why not ? ) some more buttons . LOL. 


What do you think ? enough buttons ? clear message ? like it ? 
 I'm entering this buttoned box in Craft Hoarders Anonymus Challenge # 14


Creative Commons License
by Teodora Podina © 2006
.


Sunday, July 27, 2014

Paper box mania ?

I admit I love making cards, but I adore making small paper-boxes... boxes and purses and bags and you name it . Paper all, this is all about . Is this something known as addictive and nobody told me before :D ?

So, a show of some boxes... in ascending order of dimension :
-the mini ones ;) :


then the girly-party ( or as christening gifts ) 


this model cand hold a large variety of sweets from Gifts & Gifts . Some examples : 


then I changed the colours but not the size of the box. I think that small and pretty is supreme. 
 And, as a plus of value, I added my paper flowers that I love so much . 
First model of flower ( you have the tutorial here ) 


this box model can hold also the same variety of sweets as the previous one... here showing some very fine chocolate candies from Gifts & Gifts :


and I continued making another model of paper flower, slightly different than the previous one, settled on the same box type & dimensions  :


You know already all about the sweets that can go inside , don't you ? 

And finally something ''smashing'' LOL : 


it's a big one, 8 cm x 8 cm x 3,5 cm height, and you can put a lot inside. Not just sweets, but jewelries, clothing accessories ( like silk scarfs, handkerchiefs, cashmere socks, necktie, other delicate things ;) etc ) and so on ...

Tomorrow i'll bring you something new. Colored still and different. 
Curious about ? stay tuned ;) 


Friday, July 18, 2014

Purple crumpled flower - tutorial

Do you remember my awfully blue fingers from yesterday photos ? well, I will reveal now the cause .
Next a tutorial for making a crumpled paper flower punched with Stampin'Up flower blossom punch . Something different than just layering the petals one on top the other. This is how I make this flower :


punch some petals with the SU punch from  white paper ( something fleshy than 80 gr/mp ) :


then spray them with a water-coloured mist of your choice ( mine is diy , kind of home-made LOL ) .
Use for spraying a box that will help you catch all the drops and save your worktable . Put a white paper ( or recycled one ) on the back and bottom. Later you'll can use this paper in some mixed media project or anything else that requires some crazyness in it ;) . Don't worry about the curling effect, they will become flat quickly . You have to turn the petals to spray them on both sides. 


With them still damp, start folding, once, twice , three times. You'll get it quite quickly how to fold, holding the paper in you hands. Now you'll understand why I get blue fingers.  LOL. 
I'll keep in mind to use some doctor gloves next time . Hope to remember....


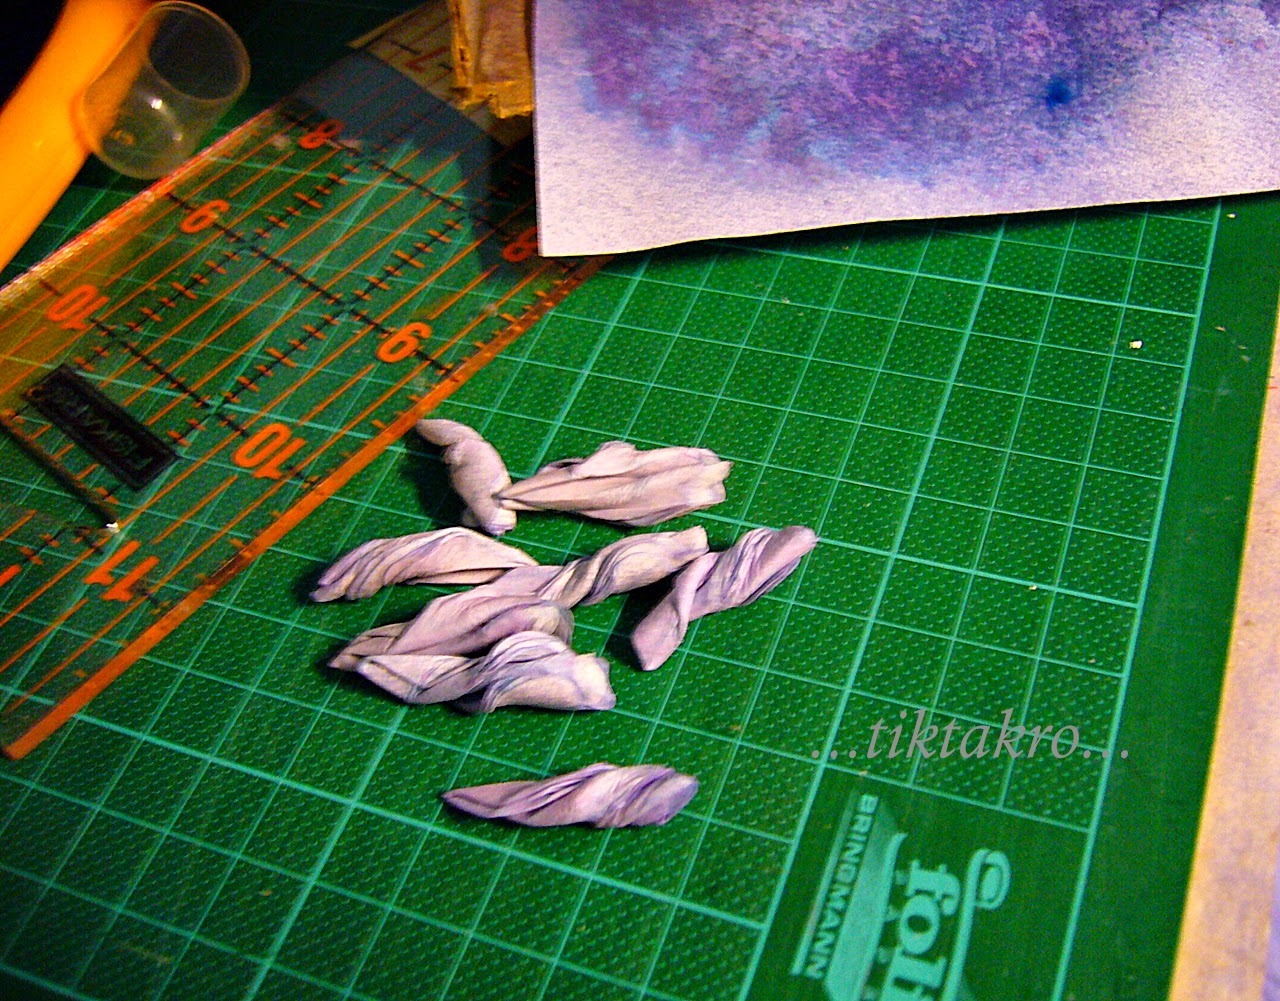
When you get to have just one petal by folding, start crumpling it between your fingers. Like so :


Then dare more : twist it ! Carefully to not break the paper, it is still wet. 


Let them dry completely as they are , twisted. 

They will dry slowly, don't rush them or you can get all wrong. 
Once they are completely dry and crispy, start unfolding them with great care. Try not to flatten too much the pieces, you want to achieve a crumpled/wrinkled look. 


With the help of a scoring tool and some tweezers start layering them as you pleased. The opened one on the base layer, the others up. Put some strong wet glue between the layers to keep them all secure . 


You can add in the middle a smaller shape worked in the same manner . The fuller, the beautiful . Like this : 


A small pearl in the center makes it finished. Or you can add something else : a button, some paper-flakes, small beads glued together, anything you fancy. I prefer simple with one pearl. 


Cut and work from the beginning many punched shapes so you'll have in the end several flowers. Of course, you can make small flowers in the same manner with a smaller punch. The smaller, the painstaking. LOL. 


Now that you have a beautiful crumpled flower, you should put it on something, no ? 
I made a box, I think I felt in love with small, cute boxes. Candies boxes. Or candy boxes ? :D 


Did I sparkle your desire for making such a flower ? if yes, will you show me your result ? I'll be more than happy to get some feedback from you. 


Tuesday, November 04, 2008

Surprises for someone dear

Surprize pt cineva drag... la plural ;))

Surprises for someone dear... at plural ;))


Kati mi-a indicat un blog fantastic, al lui Colette...chiar daca nu inteleg deloc limba maghiara imi este suficient sa vad pozele. Are idei superbe Collette! ma intreb daca ar putea cineva sa-i traduca un "multumesc frumos pt idee" in limba ei natala... taaare mi-ar place sa pot traduce blogul ei in engleza sau macar in romana... Deci din ideile Collettei s-au nascut aceste cosulete pentru cosmetice sau bomboane sau orice altceva.
Fiecare cosulet a avut anexata cite o inimioara facuta de mine, din ipsos de modelaj.

Kati send me a fabulous blog link, to Collette...even I do not understand a word in hungarian it is enough for me seeing hers photos. She make such wonderfull things. I wonder if someone could translate her a " thank you for your great ideeas" in her language...I would love so much to can translate her blog in english or even romanian...
From Collette's ideeas were born these pretty fabric baskets for cosmetics or candy or anything else.
Each fabric basket had attached a small plaster heart hand-made by me.


Interior :

Inside :


Abia astept sa le fac pe urmatoarele ! ;))

I can hardly wait to make some more ! ;))


Si in aceeasi tema am facut si o cutie de depozitare...tot din material, captusita cu musama pt o functionalitate cit mai larga ;)) . Tutorialul l-am luat de AICI !! Multumesc Amanda !

And working in the same "field" I made a fabric box...inside lining of oil-cloth for a large range of functionality ;)) The tutorial I take from HERE ! Thanks Amanda !


LinkWithin

Related Posts Plugin for WordPress, Blogger...