Showing posts with label scrapbooking. Show all posts

Wednesday, May 13, 2015

Guess what ? another card .

Guess what ? another card. Yep.
I'm in love since ever with this pink-chocolate brown color combination... also in clothing....and in sweets  ;). So, here it is transposed in a card.
A garden filled with memories and flowers ...
''Memories are the most precious thoughts of a person''


I've started from a lousy printed pale pink polka-dot paper, making it better with a layer of gesso on the down right corner, applying some modeling paste trough a stencil, then playing with a stamp ( the word ''Memories'' from Afternoon tea set of ScrapBerry's   ) in the opposite corner. Stains and sprays, edge color and teared distressed, die-cuts and...oh yes, about die-cut.  . I tried for the first time a crackled clear embossing powder tehnique on the die-cut piece ( Decorative accent and label - Sizzix - 658955 ) and this is , shortly, what I've done : embossed the piece for 3 or 4 times with Ranger Clear Embossing powder until a thick layer is build up, then I put the piece in the freezer. I forgot it there until I've finished some dishes to wash (LOL ) then take it out and -  frozen as it is ! -  bent it all the ways carefully. And quickly. Nice, big crackles appear all over it.You can play as long as you like it making crackles.  


...I add a few embellishement here and there ... a mini-frame, some recycled plastic net ( from vegetables ) , a strip of organza, cords and of course lots of flowers and some leaves. The central paper flower is made with a SU punch - Flower Blossom ( you can find a tutorial on my blog , here  ) . Pearls and some hidden diamonds, gypsum elements and... oh my. I think I stopped at the right moment . LOL . 


As always , the interior has to meet the front. In colour at least. Here I double - distressed the edges as I've done on the front. 


At this time the card is on the way to my swap partner . Hopefully she'll love it as much as I do . ;) 

I enter this card into the following challenges : 
- Mixed Media World - Vintage ,
- Anything but cute - Vintage garden 
- Paper take weekly : In the garden  ,
- Creative Inspiration - Shabby chic  ,
- Mixed Media Monthly Challenge - #12 May Flowers  . 


Wednesday, April 08, 2015

Purple , again

Purple, again. 
Unconsciously the soul breathes out .... in every thing, in every thought, in every moment. Pale or bold but purple....


I was very curious about the color combination between kraft and purple. For me it seems ok. I finished this way a card for a friend that also loves purple. 
Starting as usually with a white cardstock , stenciled with moulding paste, sprayed, glued further on this and that , then working on the embellishments. 
White heat embossed butterfly that rise up on a heart from an empty left nest... where memories remain written in a stone along with a few real feathers .
All around is a delicate spring... flowers, colours, almost a distinguishable perfume....


Did I say that I do love purple ? any kind of purple, right ? I just wanna be sure you get it ;)
I enter this card into the followings challenges : 
-  City Crafter ( flowers, butterfly ) 

- and....
 

Lawnscaping challenge - Dimension with inspirational photo : 

.

Sunday, February 15, 2015

Take some time....

It is quite some time since I felt in love with scrapbooking, cardmaking... the heaviest thing was to gather all the items needed : die-cut machine, dies, stamps, colors , embellishments... slowly, oh so slowly. 
As any beginner I was enthralled by all the freebies that I found : digipapers, layouts, digistamps, tutorials for diy embellishments and all others....
Time passes and I began to sort all those freebies... some that I cherished, some that I deleted. As my preferences diversified, my style did too... From CAS ( clean and simple ) I slipped slowly but confidently to mixed-media techniques. Other items needed, of course ;) . Gesso, embossing paste, stencils, inks and so on ... 
With each and every one piece ( card or page layout ) I made I feel that I'm at home... nothing can stop my imagination, I'm happy playing with all those mediums .


 The sentiment is a free digital one ( ADS_Cherished_WordArt1 from digichick ) .
I like to get regular news from Free Digital Minikit or from Granny Enchanted or from Pixel Scrapper ... and there are much much more with online free goodies  ....
For the beginning , the base was painted in one layer of gesso , for taking out that absorbance of paper , then stenciled with modelling paste . Afterwards, the play starts. I choose to match the warm yellow with a deep leaves green . I think they make a wonderful match. Supporting each other and letting out the beauty of each. Real friends. As in life ;).

Elements were added one by one along the story : flowers, die-cuts, a frame, air-dried embellishing elements, pearls, beads . The brush loaded with gesso starts again allover here and there,  and some inks splattered on .


The added sentiment is fully appreciated these days... by me. Should I say by you, too ? ;)

I enter this piece into : 

Sunday, February 01, 2015

Pure than snow...


Having in mind the theme ''scrapbook page layout card'' asked for the January challenge in Veryscrap.exprimetoi.net forum, I let my mind flow... 
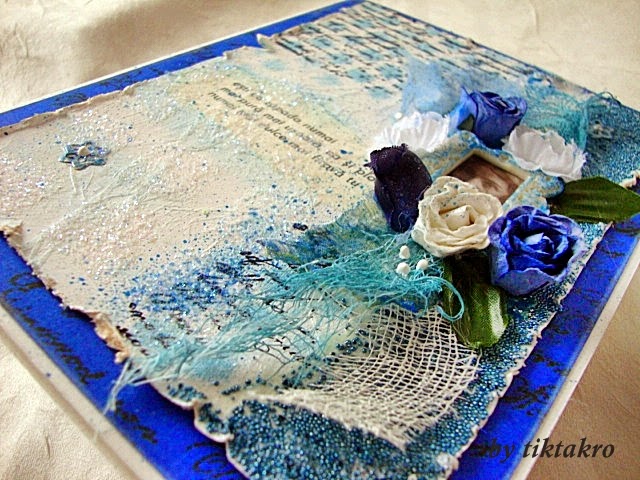
First I prepared the background with silk paper technique for getting some fake gypsum lines, followed with a gesso layer. Then one layer of crystal -white acrylic , matt. 
Found between my scraps this small piece of paper with such romantic lines, of E.E. Cummings  :
You are like snow only 
more pure, more light, like rain
only more sweet, more fragile you. 


Then I construct all the card around this text . 
Start by sponging through a homemade stencil (a piece of fence wire net ) on corners some soft blue color stamp-pad, then stamping with black Staz-on a handwrited lines Stamperia stamp( I choose deep black just for getting a powerful contrast ) .


For the love of stencils (that I developed lately ;) ) ,  I applied a Crystal light modeling paste through a diamond stencil and sprinkled fine semi-transparent glitter on top. 


Then it was time to handle the focal point part. First , for the its background I used some fine-glass microbeads, in washed denim color , glued some metallic findings ( that I previously gessoed and coloured accordingly - most of them remained hidden under the flowers part ) .


A cropped vintage picture framed, some paper and silk roses and other kind of flowers, a strip of painted and one of white gauze along a strip of non-woven fabric, a piece of heat-gunned organza and a little play with some white pearl liner on top of them here and there ... Delicate brush splashes with blue diluted acrylic color over all . 


Distressed the edges all around and the center seemed to be ready.
 It needed another layer : a piece of blue cardstock stamped with the same Stamperia handwriten text , with black Staz-on. For the love of contrasts, again. ;)
Glued finally onto the card base. A white one . Did I mention contrast ? :D


I participate in : 

Thursday, January 29, 2015

Memories from childhood

Everyone loves his childhood, right ? well... not everyone, or not entirely. I love parts of mine. Just parts....Memories, colours, scents, lights, years ....


Yes, there is me in the picture. Obviously. LOL. 
There were times when I loved wearing silky bows in my hair, when I loved smiling without worrying about the lips line... there were times.... turquoise and peach .... cats and butterflies... leaves, I always loved leaves....


This is a mini-scrapbook page, and as I know myself it will be among future others gathered in an album. How daring.... a childhood album. Mine. Sigh....

I used for this page a new light molding paste "Crystal effect" with a new Crealies stencil , and a new 3D white gel from Pentart. 
A strip of turquoise painted gauze and some hessian fabric are hidden there...

I enter this work in the following challenges : 

Wednesday, July 16, 2014

Recycled coffee-filter flower - tutorial

Take a short advice : follows a long and heavy pictured post.
Please forgive my blue colored fingers showed durig these images, they are due to a previous tutorial - still in work. That will follow soon ;)

So, perhaps many of you knows how to make a flower from a recycled coffee filter. This post is to show you my way and also to demonstrate the others that a handmade flower ( recycled or not ) means A LOT OF WORK and TIME. Just to understand....
If YOU will make ,or already made, such a RECYCLED flower, you have all my appreciation . Because recycling is a good manner to demonstrate that you care about your life. For now and for the future.

Let's start :
Take a used coffee filter. I mean really used. ;)
please try not to lick your fingers. LOL
wash it thoroughly and put it to dry 

once it's dried, cut some flower shapes with the BigShot dies that comes in the standard package. Nothing fancy. You can try to use a punch but I was not successful with that . I don't recommend using a punch on the coffee-filter.  Fold the filter in half and run it through the machine. You'll get 8 pieces from one filter . Just enough for one flower. 8 petals. Don't throw away your filter. You can cut something more from it .


Now cut the same shape but this time from a heavy cardstock.
Recycled , of course, what did you think ?

This piece is the support for distressing the petal edges. Each petal you will set up on the cardstock and with a sponge dauber ( also a diy one from a bottle cap and some old dishwashing sponges ) distress the edges ( I choose vintage gold this time ) 

Gather all of your petals and with a piercing tool make a hole trough the center. 


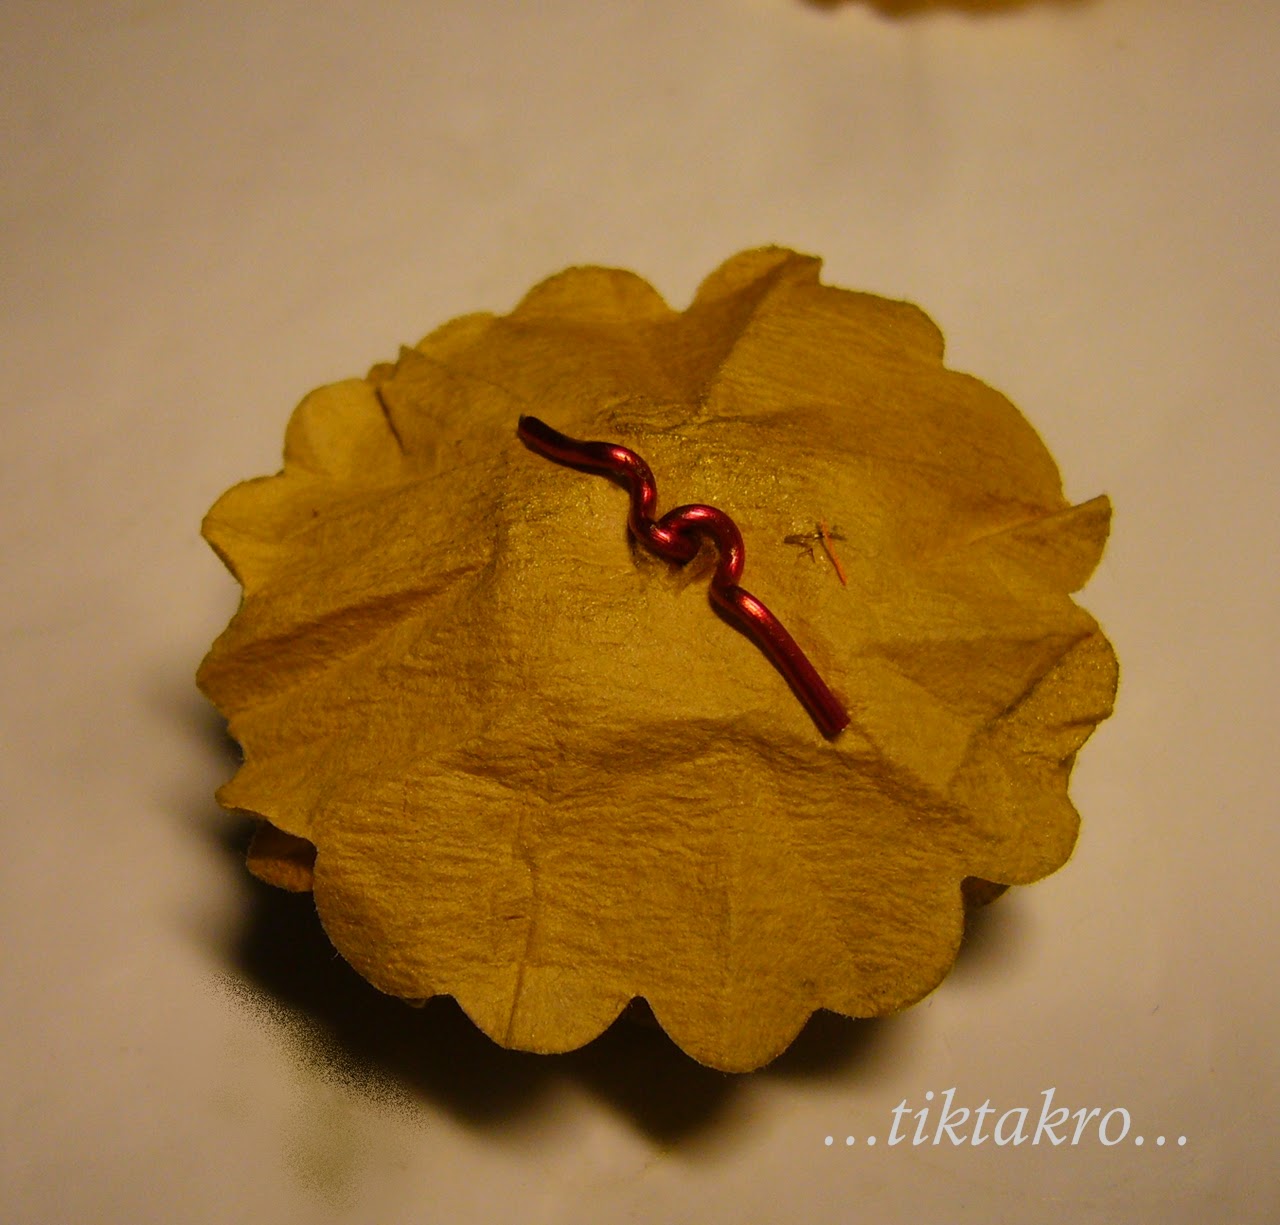
Now you have to gather all the petals with something : a brad or .... a bead on some wire. I choose here to show you how I put the bead. 


Push the bead until it hits the paper, then open on the back the wire legs.


Don't worry about the legs being too long, we'll cut them after the next step . 
Start folding/ crumpling each petal around the bead in a completely free way. Crumple and squeeze, crumple and squeeze....until the last one petal, included. 


 You'll get a ...bud. Now it's time to undo all that you have done previously. Yes, I know.  LOL . 
Start to spread out petal by petal until you are pleased with the form obtained.  A fluffy flower. 

If you un-fluff it more, you'll see the glimpse of the bead in the center, otherwise it is quite well hidden. ;) 


Now let's take care about those long wire legs from the back of the flower. Cut them according to your flower bottom. With a jewelry plier/snipper ( don't use your scissors for this, ok ? !! :) ) 


To hide them properly and also to make a base for gluing the flower onto anything else, you''ll cut a circle from the scraps of the left filter . Remember ? I told you not to throw it away ...


And glue the circle with your preferred glue ( wet glue , silicone or whatever you consider it's strong enough over the wire ) . 


Now you have a flower . A recycled flower. A recycled coffee-filter flower. 
Made by you :D . 


Pretty easy, isn't it ? 
Time consuming ? you bet ! 
Now run and wash your hands because you have to make a card to put the flower on show. Right ? 
Something like this : 


LinkWithin

Related Posts Plugin for WordPress, Blogger...